My Big Fat Gluten Free Adventure
  • Home
  • About Melissa
  • Blog
  • Shop
  • Contact

1/13/2021

It's National Gluten Free Day!

6 Comments

Read Now
 
Picture
Picture
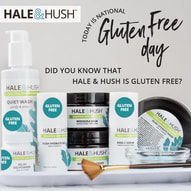
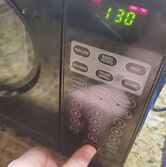
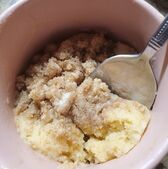
Hey All, I hope you are having a splendid week despite all the craziness in the world right now. This week has been a complete whirlwind for me and I have totally been losing track of days because we have half the apartment packed so it’s Wednesday right?

Happy National Gluten Free Day! I can’t believe I almost missed it! I need to give a shout out to one of my favorite skincare lines, Hale & Hush, for reminding me.

Stay tuned for a full post on their products soon! I know that my usual post day is Thursday, but what kind of Gluten Free Blogger would I be if I didn’t post today? And what is a holiday without cake? So today I plan to do both.

PictureDeidre and me having Dim Sum in the "before times"
Cake in a mug? Heck Yes!
​

I don’t know about you, but I love cake! Sometimes I don’t want the hassle of making a whole cake and then of course there’s the pressure to eat it all before it gets wonky. There’s nothing worse than wanting cake and having it be a dry mess.  As any gluten free baker already knows, once a cake hits 3 days it’s crumble city. I usually make cupcakes and half or quarter the recipe so I have just enough for a couple days, but I’ve already packed half my kitchen, so I was just about to go look for a box when I ended up with another plan.

I was talking to one of my gluten free besties this afternoon, Deidre, as we do most Wednesdays and we got to talking about mug cakes, and I thought to myself: “Well there you go Melissa, you don’t even have to unpack anything to bake something today!” (Thanks Dee….you are a genius! Love you!)

So off to the pantry I went and after staring for a bit I decided on making a coffee cake as I just so happen to be out of powdered sugar which is an essential ingredient in both my vanilla and chocolate mug cake recipes.

Coffee cake is another one of my favorites because I’m a sucker for a crumble and I love that brown sugar and cinnamon combo. I decided to pump it up a little with some Flavor God Gingerbread Cookie Topper. I use this stuff so much, it's great in coffee and pancakes and now as I found out today it’s also great in coffee cake.


A couple tips before I share my recipe with you:
  1. I like to make 2 at the same time because it’s hard to measure half an egg to a recipe. If it’s just you, a yolk would be your best bet.
  2. Don’t fill your mugs more than halfway or it may spell disaster. Your microwave will thank you for not being coated with molten cake.
  3. All microwaves are different. I know mine is kind of a weak one so I cooked my cake for 90 seconds. A more powerful microwave will only take a minute.
  4. When you take it out let it cool for at least 5 minutes or you will burn the heck out of yourself. (Yes, I know this from personal experience...dang my need for instant gratification)
Picture
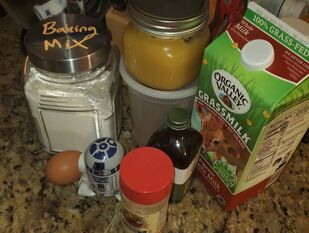
Always gather your ingredients first so you know that you have everything you need!
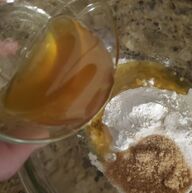
PictureMMMM Ghee
Got everything? Great! Let's Go!
​

​Mix 1/2c + 1 T Gluten Free Baking Mix (I used Bob’s Red Mill because it’s still my favorite) with 2T Brown Sugar with 3T melted butter, coconut oil or ghee in a small bowl and stir until combined. (Don’t mind my picture as all I have out still is my medium pyrex.) I used some amazing brown butter ghee that my fiance Sam made in the instant pot. I’ll have to have him guest blog about that sometime soon!


​Remove 2T of the batter and put into another bowl to save for later. Take what’s left in the main recipe bowl and mix in 1 egg, 2T milk or plant milk and 1/2t vanilla. Split evenly into two greased ceramic mugs. Add 1T brown sugar and 1T Flavor God Gingerbread Cookie (you can also just use more brown sugar and a 1/2t of cinnamon and a dash of ginger if you don’t have Flavor God) and stir until crumbly. Split evenly into mugs.
Picture
Evenly divided because I'm nice
Picture
Crumbly goodndess on top!
Picture
Yessss!
Microwave one at a time for 1-1.5 minutes. Let cool for 5 minutes and then enjoy!

​​
Picture
YUM! Fluffy and delicious!
I hope you enjoyed my quick and easy recipe! Let me know your favorite quick desserts in the comments! See you next week!

Cheers,
Melissa
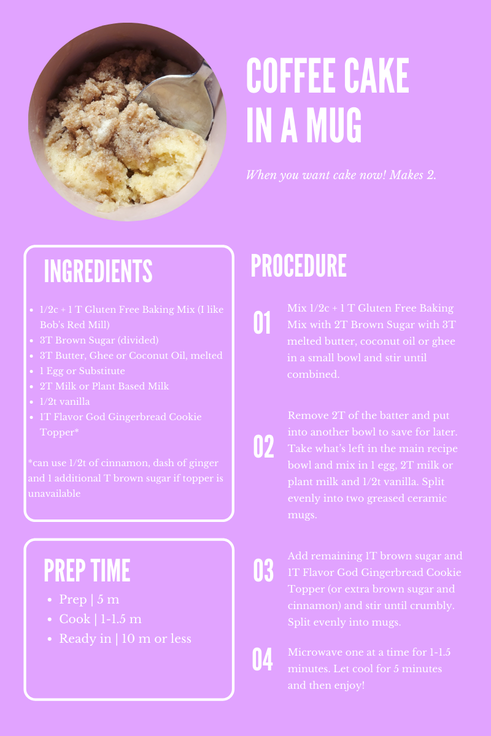
Picture

Share

6 Comments

12/31/2020

Our first London Broil!

0 Comments

Read Now
 
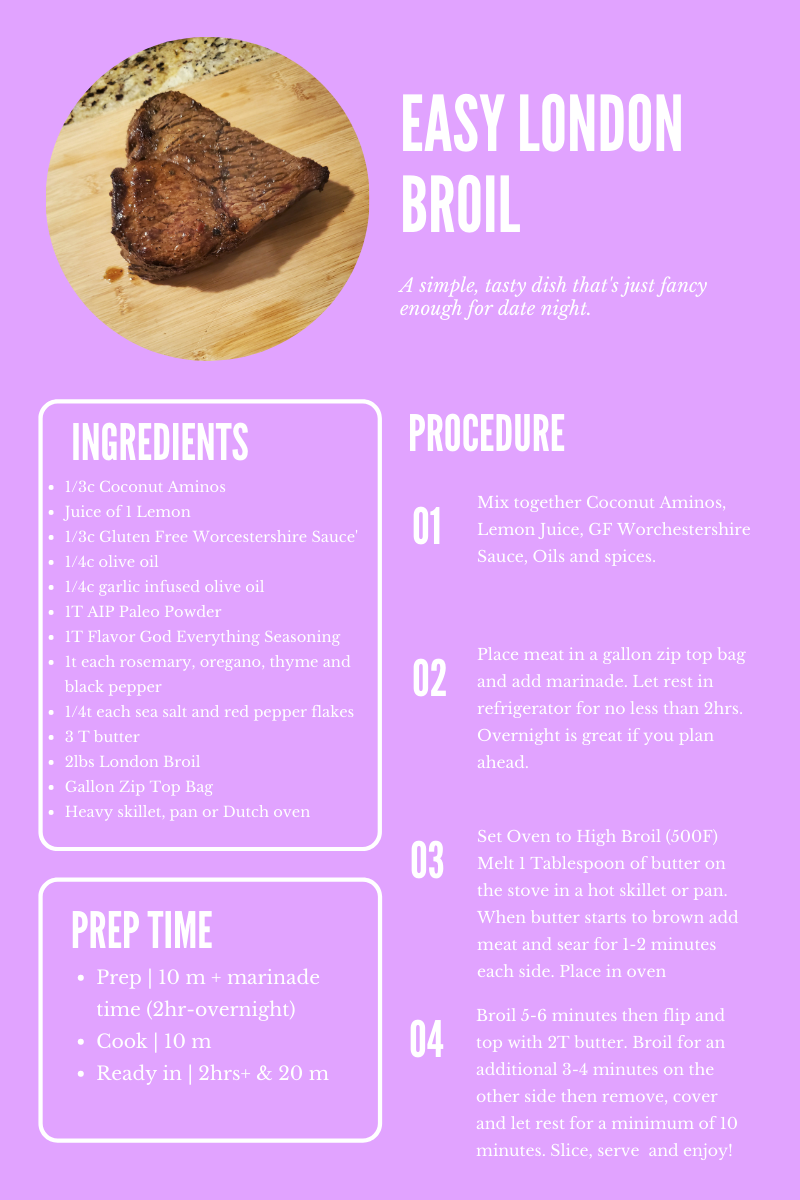
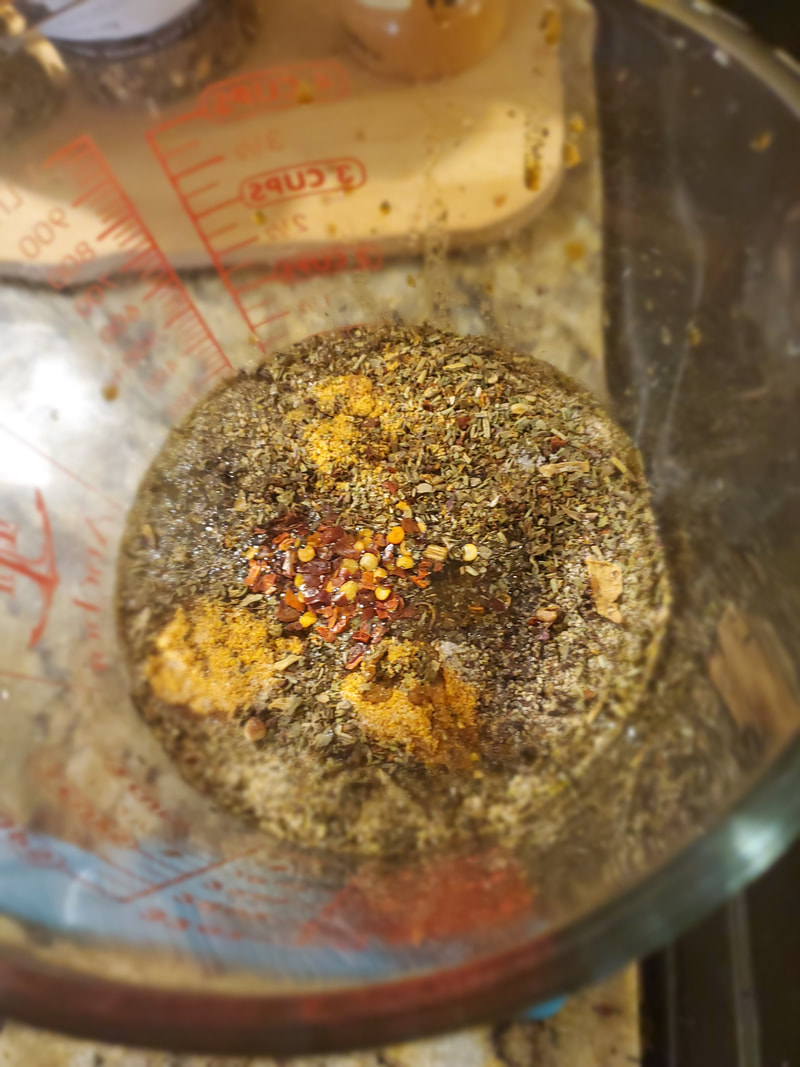
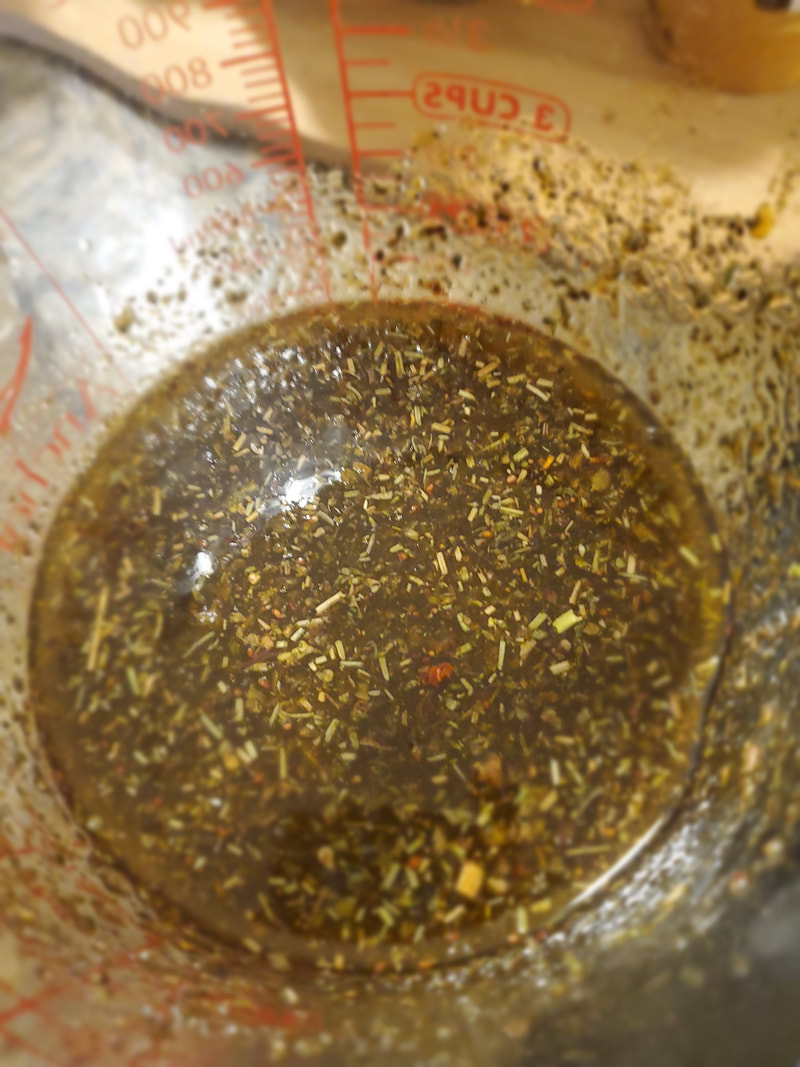
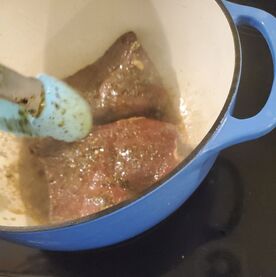
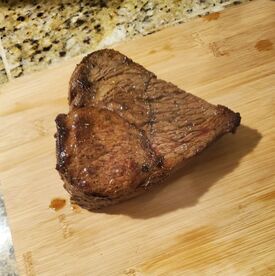
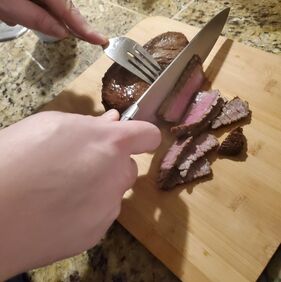
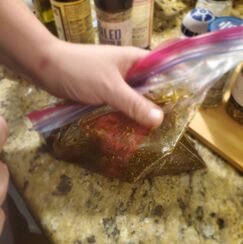
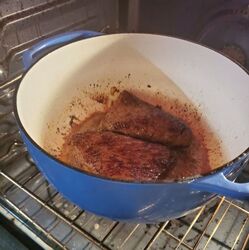
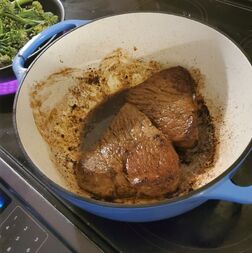
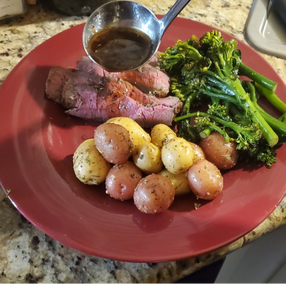
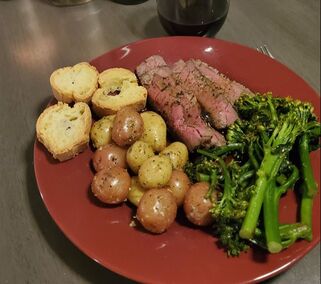
2020 is almost over! Thank goodness!

As this is a strange time for us, being in the midst of moving in the middle of a global pandemic and all, and yours truly forgot to order the Prime Rib for New Years Eve. Whomp Whomp. Luckily there was still some London Broil left at our neighborhood market so we won't miss out on all the beefy goodness. So join me (and my fiancé Sam) as we attempt to make a yummy roast beast for the two of us!
Picture
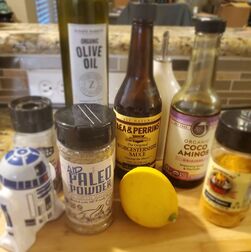
Step One: Making a Marinade
I made a really simple marinade that should give some great umami flavor to our meat.

I mixed together olive oil, garlic oil, coconut aminos (my fave GF sauce), GF Worcestershire sauce (skip this if you are feeling super sensitive, or know you are sensitive enough to react), lemon juice and lots of spices.

Besides the "usual suspects" of sea salt, pepper, rosemary, basil and thyme, I added some red pepper flakes, AIP Paleo Powder that I got from Thrive Market, and my new favorite Flavor God Everything Seasoning.
​
I put it all in a big measuring cup and stirred it until it was all incorporated, then poured it into a zip top bag along with the meat

Yum! Spices and sauces make magic.
Step Two: Waiting
In the wise words of Tom Petty, "The waiting is the hardest part" (note: if you read that to the tune of the song, we’ll probably be fast friends)

After mixing the meat with the marinade you let it hang out together for a minimum of 2hrs. We were short on time so that's how long we did it for. If you were a cool kid who remembered to order things on time, a marinade like this would be that much better if you let it hang out overnight.

I did manage to open a bottle of wine to pass the time. Tonight's dinner selection is one of my recent personal favorite red blends: Hess Collection's 2016 Lion Tamer.  It's a big, fruity and juicy red that goes great with beef (and if you're me, just about everything else).

Picture
Picture
Step Four: A Broiling Good Time
By this time your kitchen is going to feel pretty toasty. A fan can come in handy sometimes!

After you pop that beautiful meat in the oven, you'll want to give it a flip after 5-6 minutes and then cook for an additional 3-4 minutes on the other side. We know our oven runs hot (and we like it a little more rare), so we flipped it after 5 minutes, and then set it back in for 3 more.

While you are baking that roast beast, it's a great time to whip up some simple sides. We did some baby broccoli on the stovetop with some more garlic infused olive oil, AIP Paleo Powder, Mushroom and Company powder from Trader Joe's (man I love Trader Joe's. Expect a future post on this topic...) and a little extra salt and pepper.  
When your second timer goes off make sure the meat registers at least 125F, then let it rest for no less than 10 minutes. No matter how good it smells it is 100% worth the wait! 
We heated up an Against the Grain Baguette and roasted some baby potatoes while we were waiting.

Picture
Picture
Picture
Picture
Step Three: Stove Party
This step starts with one of my favorite food groups: butter. Right about now you should be making sure you preheat your oven to High Broil (500 degrees F).

While the oven is heating up, take about a tablespoon of butter and melt it in a ripping hot pan (I used my ceramic coated cast iron Dutch oven, but I've definitely used a cast iron skillet or oven safe frying pan for doing this to other types of meat in the past. Either will do just fine.) When it starts to brown you know it's time to add your marinated meat!

Sear for about a minute or two on each side and then get it in that oven!

Picture
Picture
Picture
Step 5: Finishing Touches
After your deliciousness has sufficiently rested it's slicing time! 

If you did it right you will end up with a PERFECT medium-rare! (My favorite for most beef dishes)

Then it's time to plate your beautiful meal and enjoy!

Not too shabby for a last minute NYE Feast, huh? The only thing Sam felt like might be missing is horseradish sauce, but we sadly totally forgot to add it to our list. But I thought it was fantastic with just a little drizzle of the pan juices!

It's nice to know that even when you forget to do stuff because… life… you can still make an amazing meal! Happy New Year!

Picture
Picture
Picture

Share

0 Comments
Details

    Author

    Dr. Melissa is an Doctor of East Asian Medicine as well as a self proclaimed geek glam girl with a passion for gluten free food, self care rituals and beauty products. She is based in Petaluma, CA.

    Archives

    December 2022
    September 2021
    July 2021
    May 2021
    April 2021
    March 2021
    January 2021
    December 2020

    Categories

    All
    Misc
    Recipes

    RSS Feed

Click to set custom HTML
Made By Melissa 2020
  • Home
  • About Melissa
  • Blog
  • Shop
  • Contact