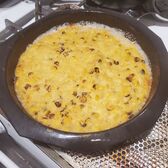
 So a couple weeks ago I couldn’t stop thinking about how much I wanted some corn pudding. I had just had some dental work done and was trying to think of some soft foods that I might enjoy for a couple days afterwards. Corn pudding kept popping into my brain and sure enough I had all the ingredients in my kitchen already so it was on! Are you a corn pudding fan? You may also know it by the names spoon bread or puddin(g) corn. I know it’s not for everyone, but it is definitely on my list of top 10 side dishes. If you’ve never had it, think about it like a soft cornbread. It originated in the Southern US and unless you have any corn sensitivities or allergies I highly recommend you give it a try.  I know my eggs aren't the prettiest, but boy is it delicious! I know my eggs aren't the prettiest, but boy is it delicious! There are a ton of versions out there and some are, of course, more delicious than others. Over the years I have developed a recipe I quite like and I thought I would share it with you! It is so easy and is ultimate comfort food territory. I love to make a big batch and serve it throughout the week. It is delicious hot or cold and works with a ton of other dishes. My favorite way to serve the leftovers is topped with eggs and sausage for breakfast! Yum! As an aside: My version contains a little less sugar than most recipes I found so if you prefer it “traditionally” sweet you might want to add ¼-½ cup more sugar to the batch. Also if you need a catchy tune to sing while you whip up a batch then look no further than the show Schmigadoon! 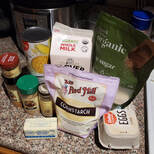 Ready to mix the corn in the puddin' now? Great! Start by preheating your oven to 400° F, gather up your ingredients and let’s go!  Next, mix two cans of cream style corn with 1 ½ cup thawed frozen corn. I like the Roasted Corn from Trader Joe’s, but any brand or even fresh works too if you have access. Add in the eggs and set aside for a minute. 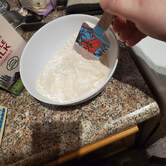 Then you will want to mix all your dry ingredients in a small bowl: Sugar, seasoning salt (I like Flavor God Everything Seasoning), garlic salt (Or Flavor God Garlic Lover’s), onion powder, dry mustard and of course, cornstarch. 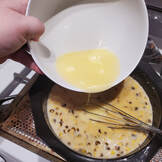 Slowly add the dry ingredients into your corn mixture and mix well and then follow with milk and melted butter. And just like that it is ready for the oven! If you don’t have a silicone pan like I am using, grease up a casserole dish of your choice. Then put it in that oven, uncovered for 30 minutes, stir and then return to the oven for another 30 minutes. Serve while warm! It keeps for up to 4 days in the refrigerator (if it lasts that long.) Yummmm! It really is good for the soul! Let me know what you think of my recipe and how you like to serve it in the comments below! Cheers, Melissa 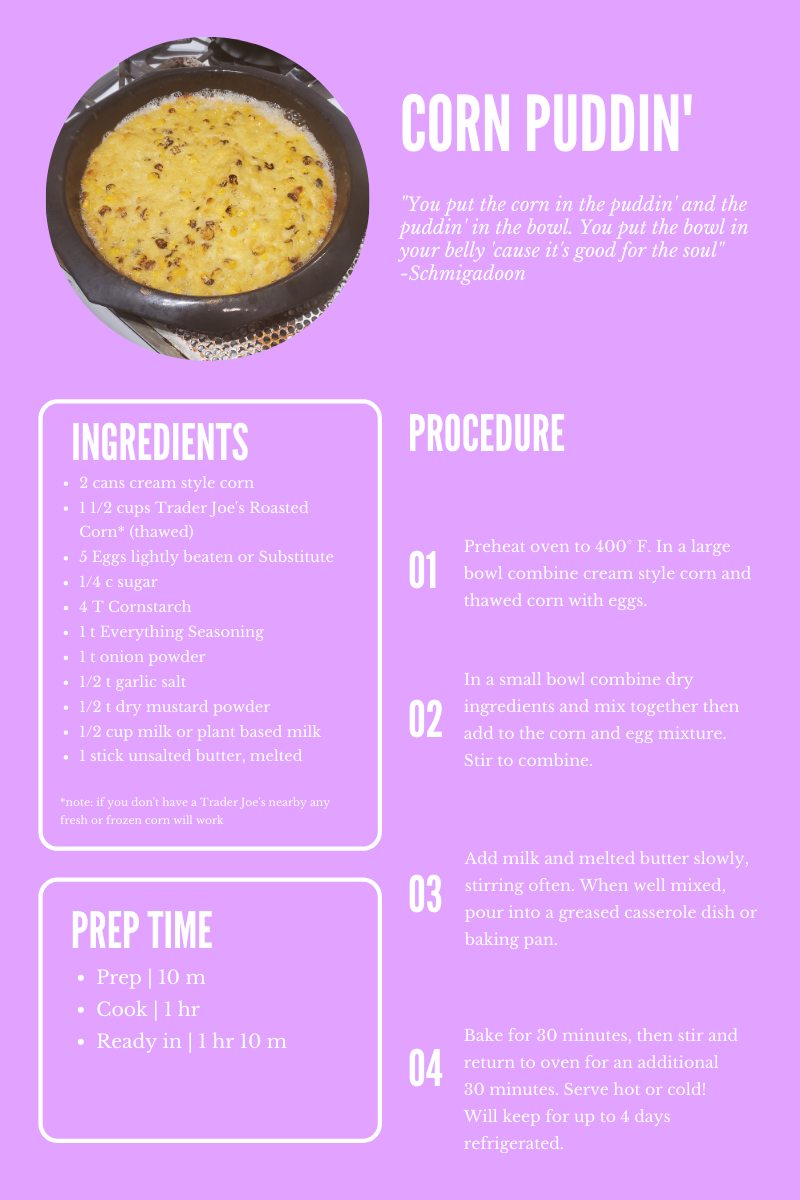
0 Comments
|
AuthorDr. Melissa is an Doctor of East Asian Medicine as well as a self proclaimed geek glam girl with a passion for gluten free food, self care rituals and beauty products. She is based in Petaluma, CA. Archives
January 2023
Categories |
 RSS Feed